Last week, we poured the basement and root cellar floors. Thanks to our team: James, Karl, Fred and Nick!
As always, concrete days are fast paced: once the trucks get there the action doesn’t stop unless the concrete says so. “Liquid stone” calls the shots for what happens and when it happens. Depending on the site and weather conditions, it may be a case of “hurry up and wait”, or a race to keep up with the concrete as it sets. Fortunately, yesterday’s placing and finishing was just right: enough time for a short break between placing, floating and troweling, yet fast enough to get the rental tools back before the close of day.
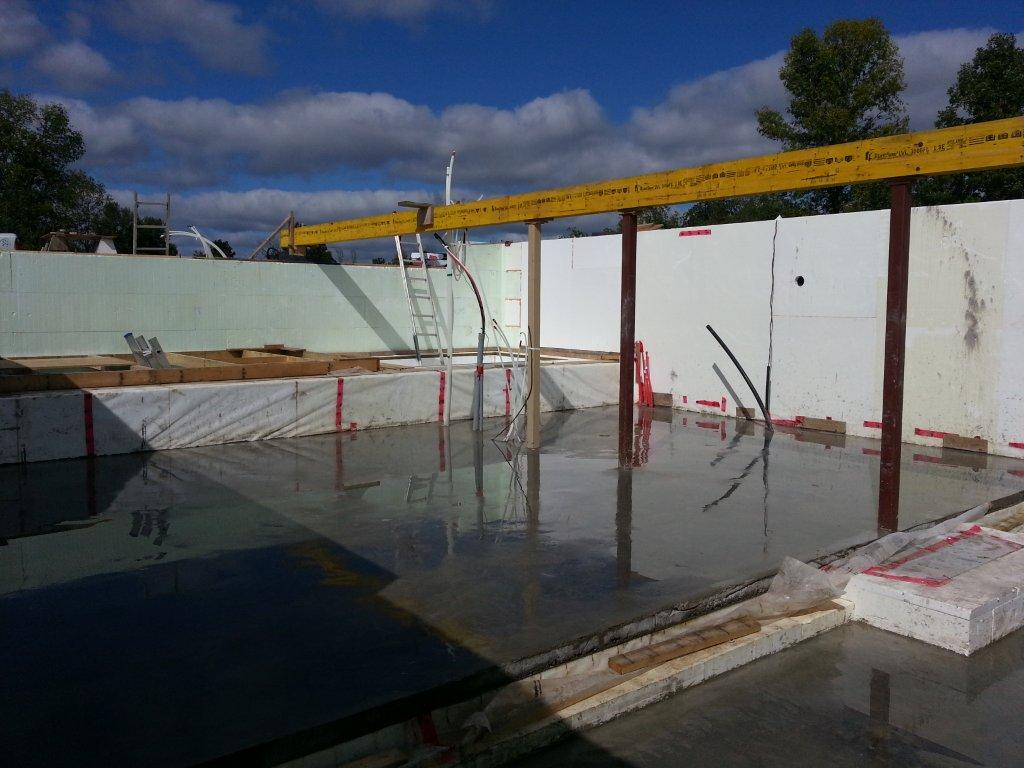 Here are a couple shots of the floor from the day after. I’ve taken off the forms and cleaned up a bit. The floors are wet because I’ve put water on them to help the cure. One photo shows the basement as seen from the root cellar. The other shows the root cellar and parts of the basement. From the pictures you can see the basement insulation:
• Basement Floor: 12” of EPS under the basement slab in two layers: 8” below and 4” over top, then the poly vapour barrier
• Basement Walls: there are the ICF walls with 2 & 5/8” of EPS and 8” of additional EPS showing, plus there will be an insulated 2×4 wall at the edge of the slab (total about R60 in the walls, not including the exterior layer of ICF EPS)
• Steel Columns: the columns stand atop footings which themselves are sitting on EPS of high compressive strength. The column footings are surrounded by EPS with no through path of less than 12” (minimum R50). The EPS bump-out into the root cellar, 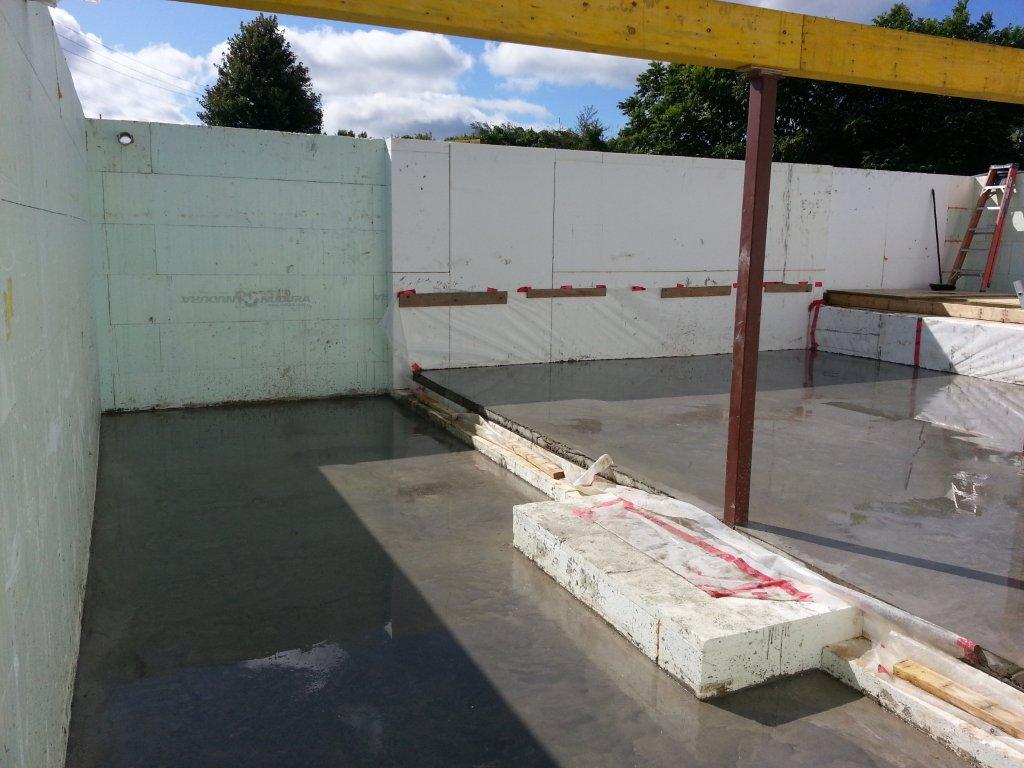 that can be seen in the photos, shows how the closest column footing protrudes into the root cellar, which is outside the heated envelope, and is insulated with EPS. The only part currently missing is the EPS that will cover the footing.
One further note about the concrete in case anyone is thinking the same thing: I added air to the mix. This is another small departure from normal practice, but in this case I thought it prudent because of the weather conditions in the autumn. The slab is currently exposed to the night sky and is well-insulated from below. The root cellar slab is not insulated below, but it does sit over crushed stone, so it is not effectively thermally coupled and the basement slab is completely decoupled. So, both slabs are at risk of freezing. To give an illustration of the risk, Tuesday morning Nick & I arrived at the site to make our final preparations for the pour. Nick’s task was to get the water out of the basement area where the poly vapour barrier had created a “bathtub” and was holding rainwater. Despite the fact that the air temperature overnight had not dropped below 5° C, the water on the poly had frozen from radiation to the night sky. So Nick was picking up small sheets of ice instead of sopping up water. That proved my concern to be valid: if water can freeze overnight when it is still above zero, what might happen to the slab when the temperature drops below zero? Hence the air.
We’re still looking ahead to the next stage: lining the tanks. After that is done, we move on to some framing in the basement mechanical room and at the corner of the garage. That will allow us to install the load centre and meter base. We can then connect the house to the grid and run all our power tools off the grid versus a generator (helps reduce carbon emissions). We then kick into framing: floors, walls, roof, etc. Windows are already waiting in the warehouse. My plan, ultimately, is to get the house framed, roof on, windows in, pressure test done, then add the Larsen trusses and insulate them. With this really thick layer of exterior insulation and windows in-place, the house should stay comfortably warm on its own so we can work in comfort over the winter on the interior: plumbing, electrical, floors, HVAC, etc.
No comments yet.