We moved three steps forward last week: the laundry room (the room between the house and garage) got insulated and sealed off from the house, the Eastern gable end got sheathed, as did the ceiling of the main house. Taken together, it gives the project a real sense of progress and a nice way to end the week.
Laundry Room. The build of the laundry room was accomplished in three stages. The first stage was to build out the Larsen Trusses and fill them with dense-packed cellulose. During this stage, we experimented and refined our methods of dense packing. I’m happy to say that we are reliably achieving very high levels of high density using both the aluminum blowing tube and manual compaction methods. Having two different methodologies gives us flexibility for different applications.
We also determined that the densities we were achieving were sufficient to counteract any settling in the large and tall (16” deep x 24” wide) cavities, regardless of the column height (up to 23’ tall). This was a real concern during the design stage and there was little help to be had on this issue in the Canadian cellulose industry at large. Initially we were installing shelves at 4’ increments to reduce the accumulation of pressure with column height, but when we were achieving densities of 5.3 pounds per cubic foot, there was significant counter-pressure and zero settlement. Subsequently, and after consultation with an expert in the USA, we stopped adding shelves.
The second stage of the laundry room was closing off the intermediate wall with the house. We covered it with poly film, insulated it with mineral wool and installed an exterior door between the room and the rest of the house. The wall was to be insulated anyway because the laundry room is intended to be left naturally ventilated three seasons of the year. This will allow for hanging clothes to dry inside. At this stage of the build, an insulated laundry room provides us with a warm place to go for lunches, a place to keep some of our tools warm and dry (think batteries) and a place to store materials that are temperature sensitive.
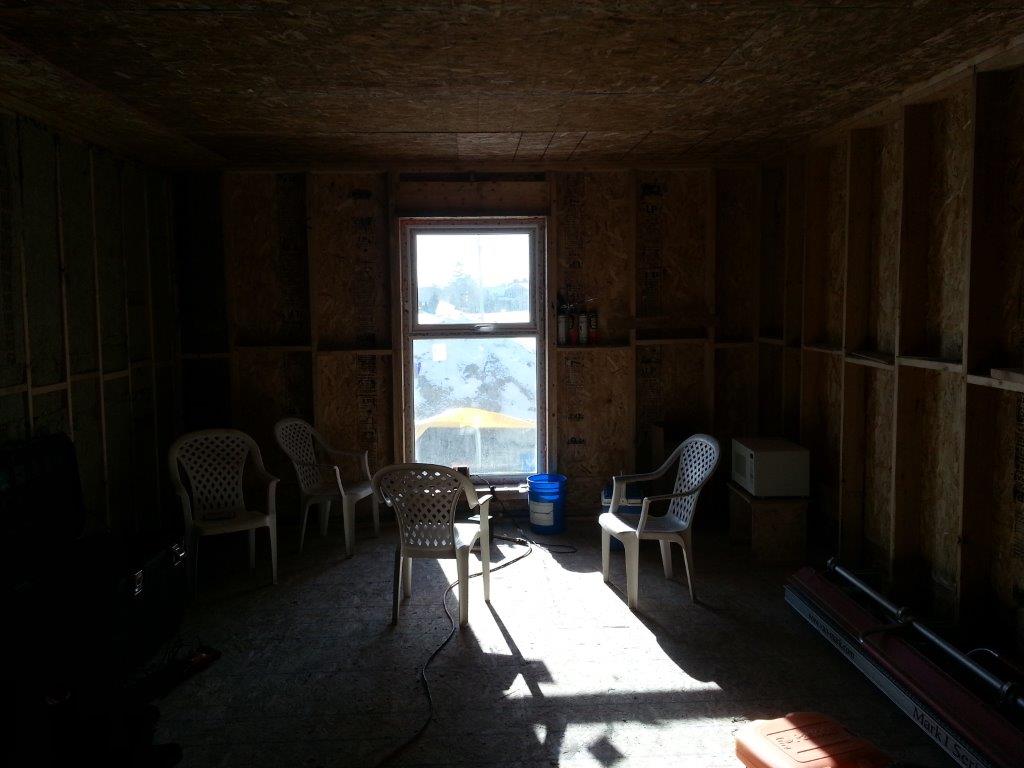
The Morale Room
James has dubbed it the “morale room” and it is a real milestone.
The last stage of the laundry room was to sheath the ceiling and blow in loose cellulose. However, before closing it up, we installed an attic hatch in the wall with the garage workshop and built a catwalk around the attic. This facilitates very easy access and movement within the attic.
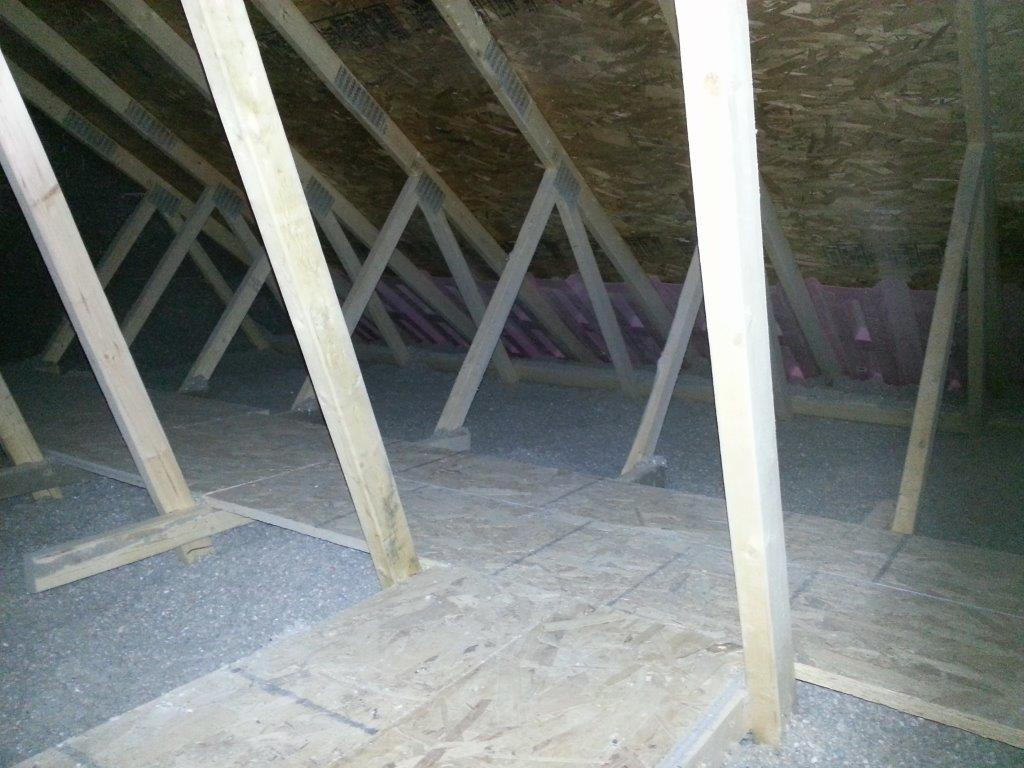
Laundry Attic with Catwalk
Eastern Gable
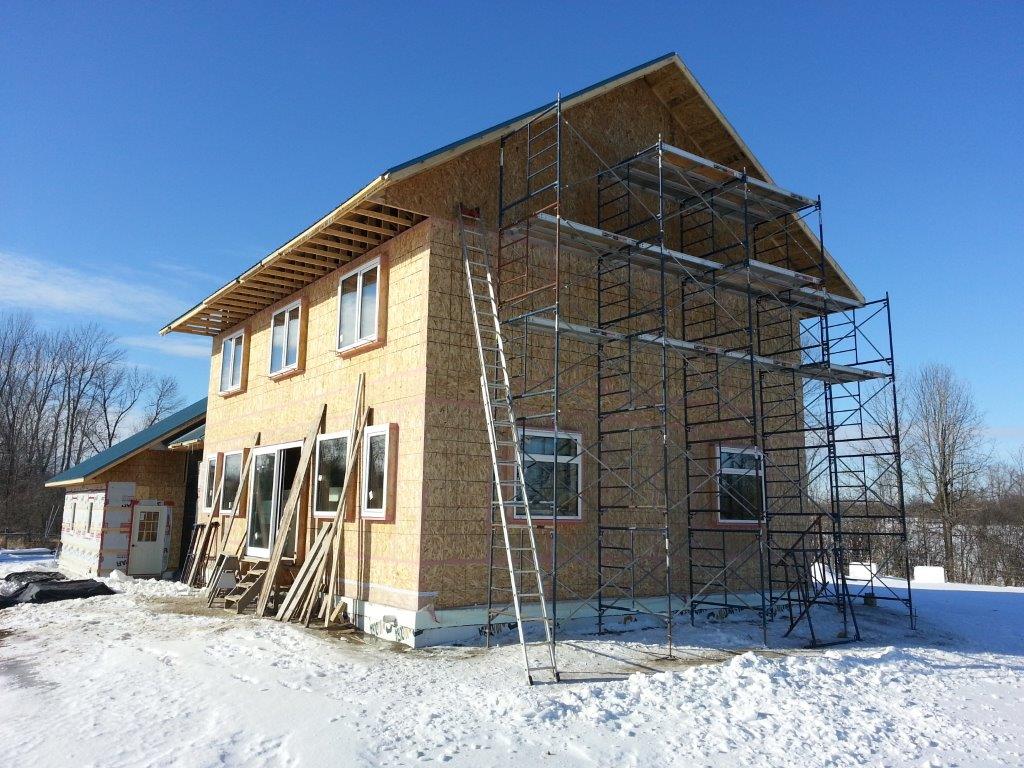
Eastern Gable. Sheathing the Eastern gable was straightforward and quick once the scaffold was erected. By closing in the gable end, we significantly reduced the threat of snow getting into the attic and the upper floor of the house. Until this point we were still having to clear snow out from the upper floor after heavy weather events. Removing this threat then paved the way for the next step: sheathing the ceiling.
Ceiling. With the snow threat managed, we installed OSB sheathing to the upstairs ceiling. This has closed the space in. For those unfamiliar, the OSB sheathing joins with the wall sheathing to form a continuous vapour and air barrier. We starting applying Prosoco Joint & Seam filler to seal all the joints and to complete the barrier. The window gaps were also filled with foam and will get taped to complete/enhance the seal within the next few days. Once all the sealing is done we’ll give the house its first air tightness test with our blower door. Testing early in the process allows us to identify and rectify any issues while they are easier to find and remedy.
The ceiling of the main house was the latest of the changes that give a real sense of achievement. It does darken the space somewhat, but closing it in and eventually sealing it, will reduce exfiltration and the losses of solar heat gains which should result in some noticeably warmer interiors on sunny days. In fact, I’m counting on it, and expect that it will get to – and remain – at a sweater working temperature once we have the house’s Larsen Trusses and attic insulation in place.
Last point on the ceiling: the attic hatch. This illustrates the “extra mile” we are going to ensure the high performance (low energy) of this house. Given the intention to mount a PV (solar electric) array on the roof of the main house, easy access during and after construction is important. Until now I’d been favouring an exterior entry; above the roof over the laundry. This would have made the airtight sealing and thermal bridging issues irrelevant, but it would also have made access much more difficult and deliberate. Also, there is the issue of the aesthetic of the access hatch. If the hatch was outside, the siding would be disrupted in some manner and some simple means of access over the steel roof would have to be kept on hand.
On the inside a hatch cover would either be in the ceiling of a room, hallway or closet. We’d also have to avoid truss members so that the access point wasn’t crowded once you were in. Further, we’d need to provide a deep/ R-100 hatch cover that had a good air seal. These conditions necessitate that the hatch be at some point down the middle axis of the ceiling (directly under the peak).
Ultimately we decided on the interior solution with the hatch in the ceiling of the Master Bedroom. The attic hatch, as currently envisaged, will be in two parts: a lower hatch that would be held up to the ceiling OSB and taped for air tightness. The lower hatch would also have a thickness of Expanded Polystyene (EPS) to achieve a value of R-50. There will also be a top cover that sits atop the hatch “tunnel” made of more EPS for the additional R-50. We may add a tensioner to keep the top hatch closed tightly in order to reduce air movement and associated heat loss.
Next Steps. Plans for the immediate future include:
• complete the air sealing and do the air tightness testing
• strap the ceilings of the laundry room and upstairs
• Larsen Trusses starting with the Eastern end
I really enjoy watching this home take shape! Its a vision to the future of home construction and the options before us.
Thanks for sharing 🙂
Shane