A month has passed without an entry. So what have we done?
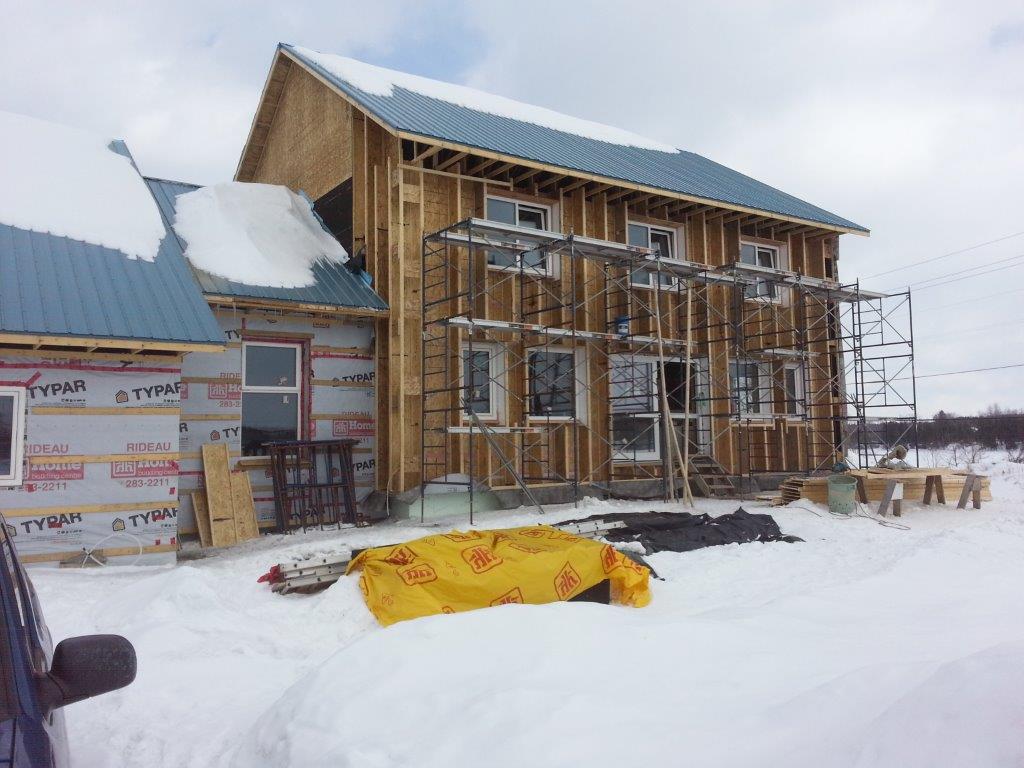
South Wall Larsens
South Wall. From the Eastern wall, across the South and around the corner to the West wall: Larsen trusses have been put up, sheathed, dense-packed with cellulose, windows detailed, wall covered in Typar and a first layer of strapping applied. Work was completed recently, but was taking place over the last month amidst other activities.
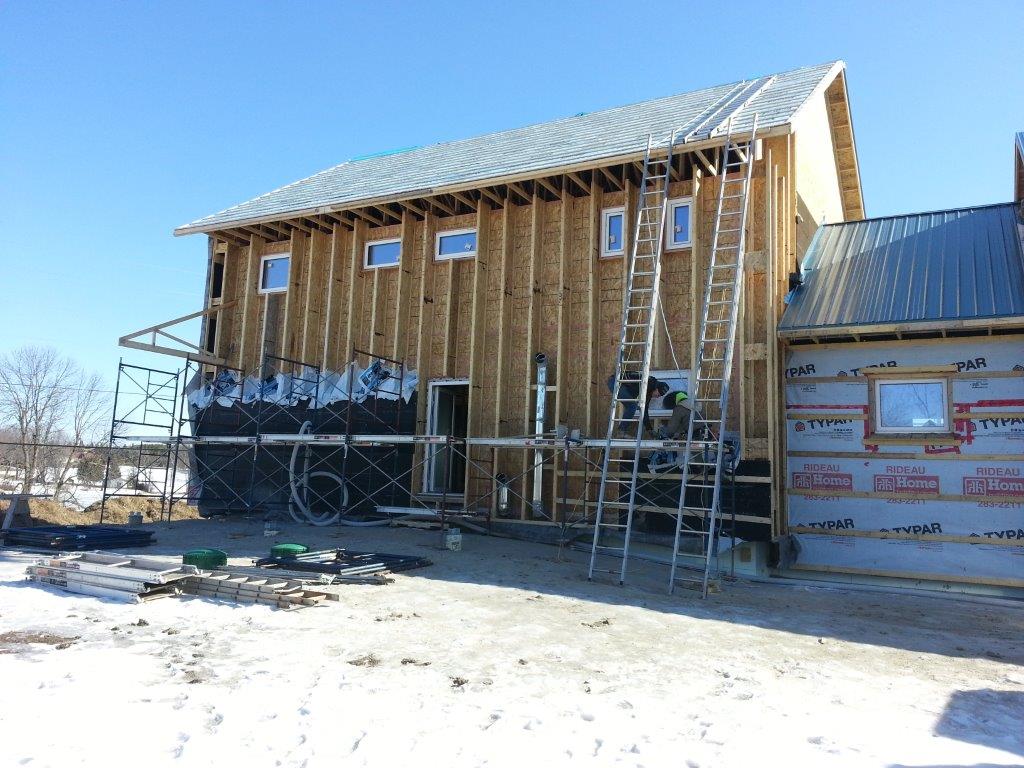
North Wall Starting the Dense Pack
North Wall. The latest work has been on the North wall where the Larsen trusses are up and sheathed, and dense-packing has begun. This wall also has the ERV (Enthalpy Recovery Ventilation) exhaust and supply vents, so if you look closely you might see those tubes. The ERV is in the mechanical room below grade, so it was a bit tricky running the ducts. To keep the interior run length limited, the ducts exits as closely as possible (through the main floor header), and run up through the outer edge of the Larsen truss cavity. The exhaust vent is low and the supply vent is high. I’m considering a higher R-value insulation localized in this wall to make up for lost insulation value.
As we progress up the wall, we need to accommodate the deck roof trusses (you can see one tacked on to the side of one of the Larsen trusses) and the supporting structure for the deck.
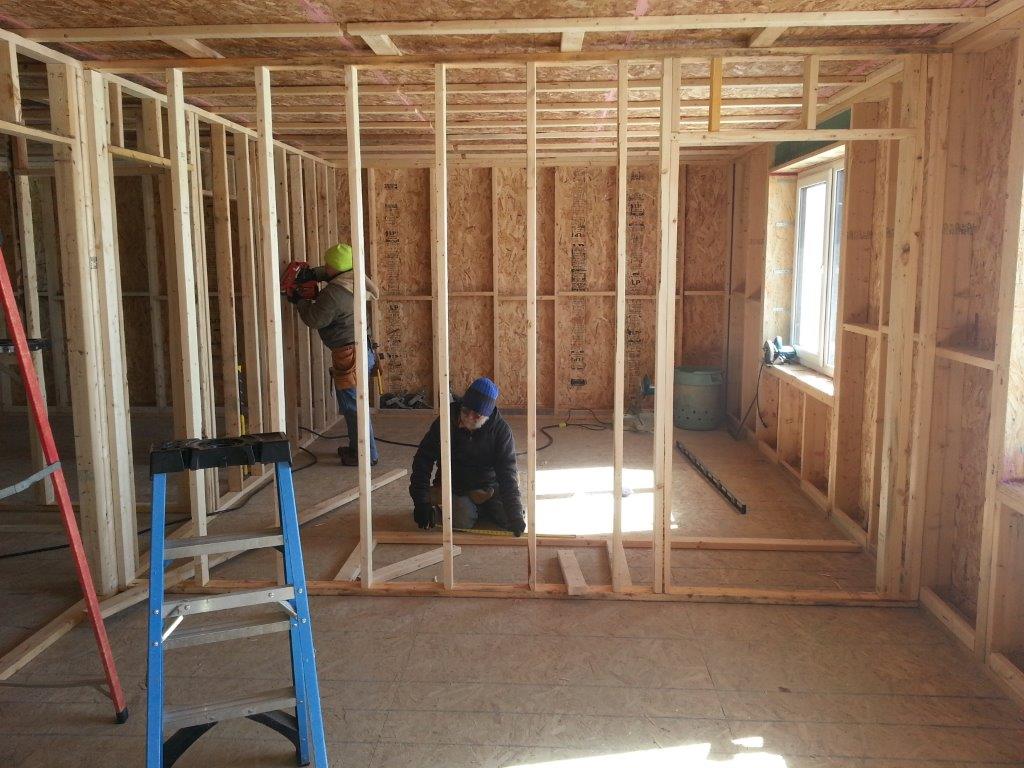
Partitioning the Upper Floor
Partition Walls. A couple weeks ago we put up the partition walls on the upper floor. That made things look like a big leap forward was made. It also put us in a position to start a number of other tasks. For one, we were able to then plan for the plumbing fixtures and piping, as well as the ventilation system. We were also able to make more detailed plans for lighting and electrical.
Plumbing – Drains. Drains have been roughed-in and are ready for pressure testing. Our layout of rooms and fixtures allowed the plumbing to be compact and will pay dividends on energy savings for hot water. It did, however, make the plumbing more complex given that so many items were in close proximity where the upper floor bathrooms were concerned.
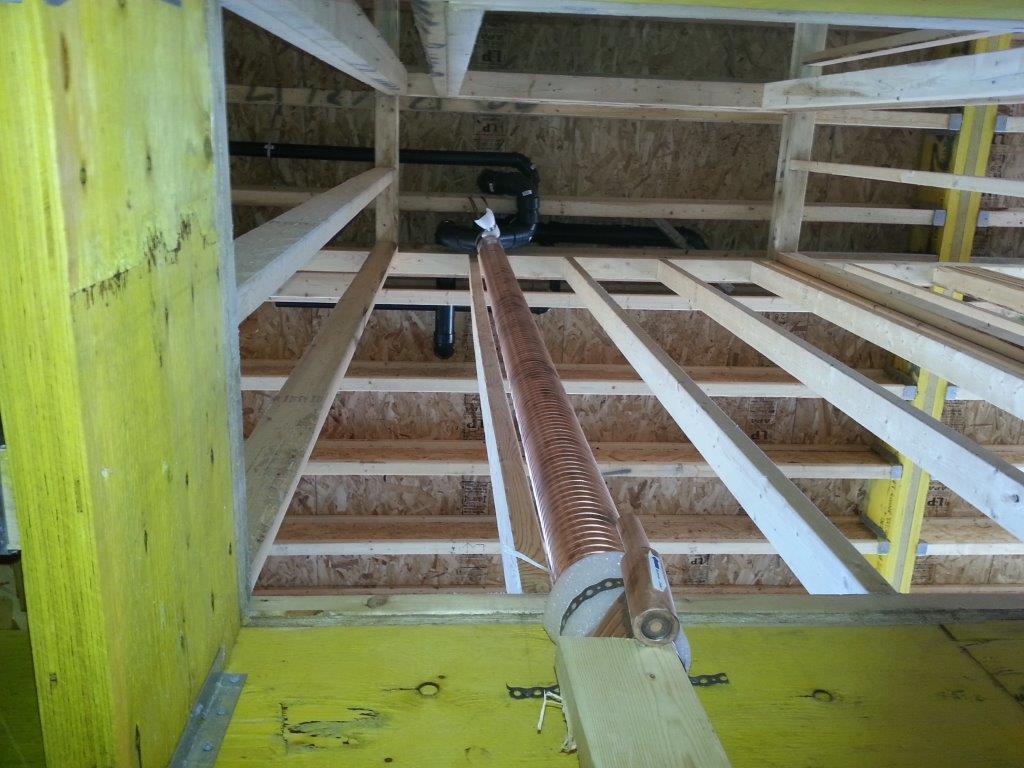
Drain Water Heat Recovery
The big thing to note is the installation of the Drain Water Heat Recovery (DWHR) pipe. This nine foot section will save up to 70% of the heat energy used in the shower. It works by taking heat from the warm water going down the drain and passing it to the incoming cold water that mixes with the hot water in the shower. The warmer the cold water, the less hot water is needed to make the shower the right temperature. It only works for concurrent flows, though. It can’t take heat from waste water coming from baths, dishwashers or wash-machines because the waste and fresh water flows are not concurrent.
Ventilation. Although there are no pictures to show here, we have begun installing the ventilation ductwork. It has been a challenge to design and build the ductwork in a manner that doesn’t require bulkheads. The second floor has a flush beam and joist system where none of the ducting or drains can pass through the beam, so we did have to install a drop ceiling in one portion of the first floor. Also, some of the drains and ducts have had to be run in exterior walls, but we were able to avoid any structural conflicts. Further – in case anyone is wondering – it is OK to put pipes in our exterior walls given that they are two feet thick at points and they are at a place where there is zero risk of freezing.
From the energy perspective, ventilation is an interesting part of the build and the system will be closely monitored for performance. The ERV unit is an Air Pahoda ULTIMA 240 iERV. It is self-balancing via two ECM fan motors. It is very efficient electrically and with heat recovery, and has the ability to either reject or recover enthalpy (water vapour and its energy) dependent upon conditions and interior relative humidity. In other words, it has a limited degree to manage interior humidity.
To this system, we are adding two heat exchange coils that are connected to ground loops. The first one uses an anti-freeze medium and passes through loops buried under the garage floor. It is used to pre-heat air coming in from the exterior. It uses the same ground loops that will be used to dump excess solar thermal energy in the summer and fall.
The second heat exchanger is on the fresh supply side of the ERV. It is used to cool the fresh air supply with water circulating through loops buried outside the house’s footprint at an average of 10’ below grade where it is very cold in the summer. Having consulted the psychrometric charts, it does look like we’ll get some cooling, and under some conditions there will be some humidity removed from the airflow. Not bad since we also have the ability to circulate the same water into the floors for radiant floor cooling; of course, we’ll be mixing the water temperature up so that we don’t get condensation on our floors! The idea – which is hopefully clear – is to achieve comfort in a natural, convenient and simple manner without having to resort to high energy and complex things like heat pumps or air conditioners.
Looking Ahead. Next steps include:
• Complete the North wall exterior.
• Insulate the attic to R-100.
• Install remaining steel roofing on the North side of the main roof.
• Build the deck on the North side.
• Complete the ventilation system.
• Install the radiant floor heating system and cover it with concrete.
• Electrical wiring!
• Water supply plumbing.
No comments yet.