The silence may have been been deafening. Sorry to keep you in the dark about our progress. The build hasn’t stopped; we’ve just been putting everything we have into it in a race with winter. Our immediate goal is to get the roof on, the walls sealed, windows in, air tightness tested and the exterior layer of insulation on (Larsen trusses) before the snow flies in earnest. It’s a challenge with our limited crew size, but it looks achievable.
Garage Space for the Larsen Truss or “The Parka”
Lots has happened over the last month of framing. We now have the garage, workshop (over the garage) and shed framed, with trusses over the shed portion. The shed/garage roof will support the solar thermal array when we get to that stage. These portions of the house are not built to be heated, so there are no special techniques or efficiency measures in its framing. The only area of note in this regard is the gap between the garage and the part of the house that it is attached to. This gap will accommodate the 18” of Larsen Truss (an insulated wall system that is suspended off the structural wall). I affectionately call the Larsen Truss “The Parka”. The big, warm wrap will provide the lion’s share of the thermal barrier for the house and will permit us to work in relative comfort throughout the winter with plumbing, heating, ventilation, flooring, finishing, etc. In fact, with The Parka and the house’s passive solar features, we should not require any heating and I expect that the temperature will bounce around in the neighbourhood of 12°C to 15°C; quite comfortable if you are turning a wrench or swinging a hammer.
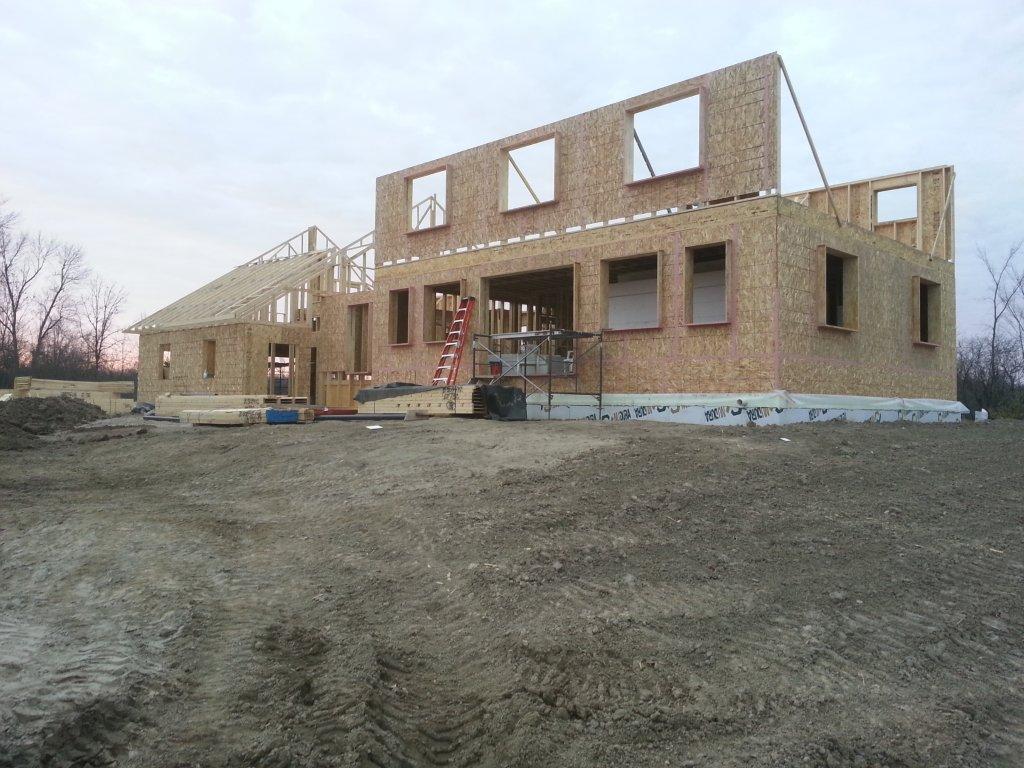 The main house framing now includes the laundry room (area over the Long Term Storage), between the garage and the main house) and the main part of the house.
Departures from the norm include:
• Removable floor in the laundry room. To have reasonable access to the Long Term Storage), the floor of the laundry room has to be able to be removed and replaced. The long term storage is covered, sealed, and insulated, so there will not be any issues with water vapour or heat damage to the floor.
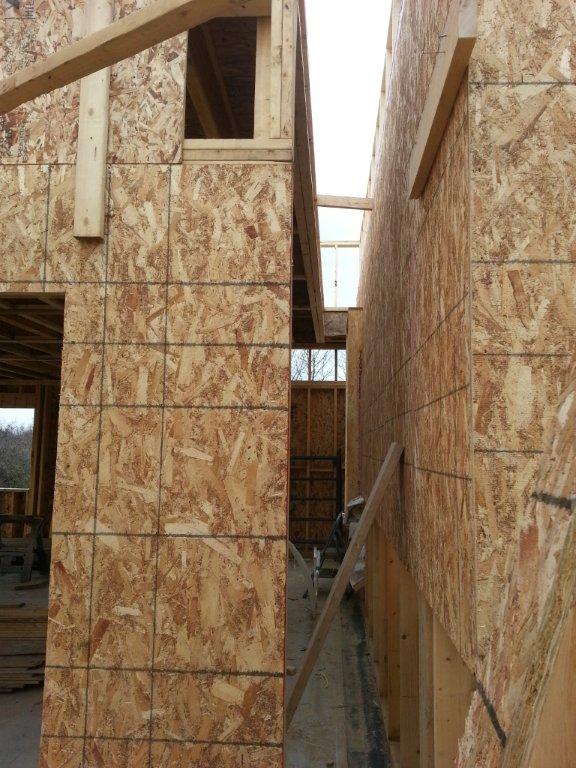
• Window bucks throughout the house. Because the walls will be close to two feet thick, and because the ideal place for windows is in the middle of the wall, we need to project the windows out from the 2”x6” structure. That will put them about 1/3 of the way into the Larsen Trusses. You can see the window bucks in the photos of the main house.
• Reduced wood content in the structural framing to mitigate thermal bridging and increase efficiency. Only so much of this can be designed-in, the remainder being decisions made on-site as the framing progresses. There are definite deviations from standard practice. For one, we are installing studs are 24” on centre. For another, at the corners we are omitting the additional framing member that acts as a backer for drywall to screw into. Instead we will use corner clips. Another is to factor the vertical elements of the bucks as “Jack” studs (engineer-approved).
• Using a layer of OSB (oriented strand board) not just as the structural sheathing for the main 2”x6” structure of the house, but also as the vapour retarder and the air barrier. To achieve air-tightness we had two options: tape or liquid-applied membrane. We chose the latter and are using a product called “Prosoco” to fill the gaps and joints in the OSB and the edges of the window bucks. The windows will get taped to the bucks and the gaps around the frame will be filled with low expanding foam. The ceiling of the attic will also get a sealed layer of OSB to the underside of the trusses to complete the air barrier. An additional layer of 2”x3” will give us a service cavity for things like lighting and a structure for drywall screws without risking the airtight seal already achieved.
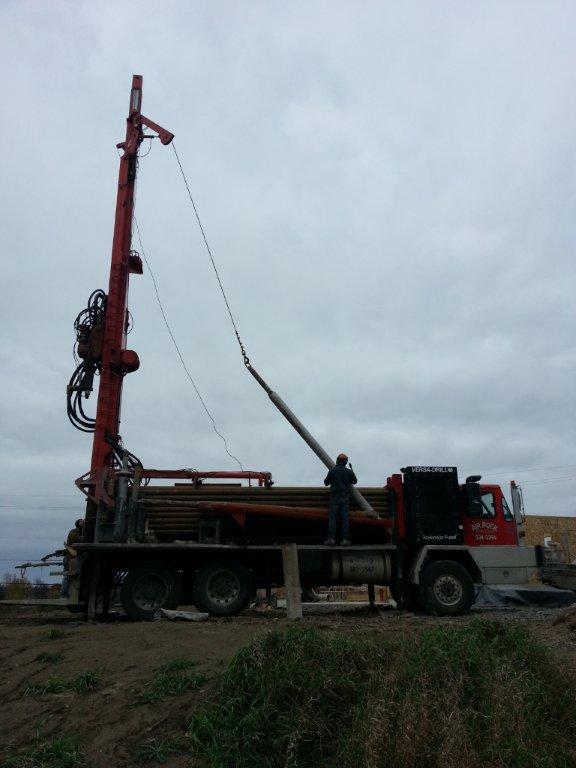
In the last month we have also had the well drilled, have begun trenching for our underground connection to the electrical grid and have had the septic field completed and inspected.
Plans for the immediate future include:
• Get connected to the grid so we can have power without the generator.
• Complete the upper floor walls.
• Complete the wall sheathing and air sealing.
• Prepare for installing the trusses by planning their layout and adding a layer of OSB atop the walls.
• Hire a crane, lift and fix the trusses into place.
• Sheath the roof and install the steel roofing.
• Install and seal the windows.
• Test for air tightness.
• Add the Larsen Trusses and insulate them as we go.
These next steps are largely standard construction practice, but virtually each of them needs to be modified in one way or another to accommodate the requirements of this build. Building and insulating the Larsen Trusses is perhaps the most complex deviation from standard practice and one where we’ll be innovating and learning as we go.
In a final note, I would like to say “Thank You’ to those who’ve helped us in the Havelock Metal “Win Your Roof” competition. We were finalists in the final week of the competition. Although we did not win the overall competition, we did receive a nice 10% discount prize for being a finalist. As you know, every little bit helps, and we are looking forward to our new “Slate Blue” steel roof from Havelock.
Thank you everybody and thank you Havelock!
Chris
Sounds like you are well on your way and i am just jumping into the project now.
Don’t forget in your “long term storage” area that you should have ventilation either between the space and the home if its to be conditioned, or between the space and outside if not. You definitely don’t want an enclosed insulated air-tight space.
Perhaps you have already covered that……best of luck and look forward to your next post.
Jeanine (JB HVAC Design)